


As a supplier of Biaxial Geogrid 40kn, I've seen firsthand how crucial it is to ensure the flatness of this product during installation. Flatness isn't just about aesthetics; it directly impacts the geogrid's performance and the overall success of your project. In this blog, I'll share some practical tips on how to achieve and maintain the flatness of Biaxial Geogrid 40kn Biaxial Geogrid 40kn during installation.
1. Site Preparation
The first step in ensuring the flatness of the Biaxial Geogrid 40kn is proper site preparation. A rough or uneven surface can cause the geogrid to buckle or wrinkle, leading to poor performance.

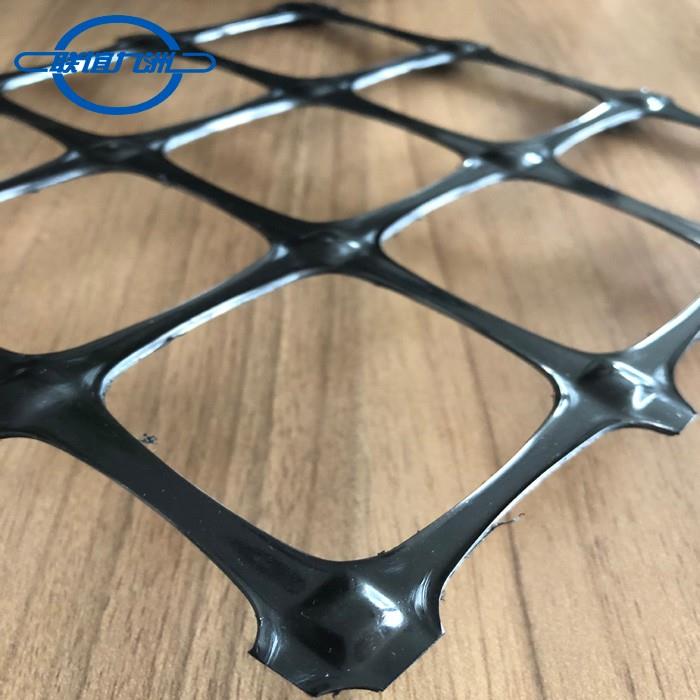
- Clear the Site: Remove any debris, rocks, or vegetation from the installation area. This will prevent these objects from creating bumps or unevenness under the geogrid.
- Grade the Surface: Use a grader or other appropriate equipment to level the ground. Aim for a smooth, even surface with a maximum slope of 3:1. This will help the geogrid lay flat and prevent it from sliding or shifting.
- Compact the Soil: After grading, compact the soil to increase its density and stability. This will provide a firm base for the geogrid and help prevent it from sinking or settling over time.
2. Unrolling the Geogrid
Once the site is prepared, it's time to unroll the Biaxial Geogrid 40kn. This step requires careful attention to detail to ensure the geogrid lays flat and straight.
- Start at One End: Begin unrolling the geogrid at one end of the installation area. Make sure the geogrid is aligned with the direction of the slope or traffic flow, if applicable.
- Use a Roller or Tractor: To help keep the geogrid flat and prevent it from curling or wrinkling, use a roller or tractor to pull the geogrid as you unroll it. This will apply even pressure and help the geogrid conform to the surface.
- Overlap the Seams: When unrolling multiple rolls of geogrid, make sure to overlap the seams by at least 6 inches. This will ensure a continuous and stable connection between the rolls.
3. Securing the Geogrid
After the geogrid is unrolled, it's important to secure it in place to prevent it from shifting or moving during installation or use.
- Use Anchors or Staples: Depending on the soil conditions and the application, you may need to use anchors or staples to secure the geogrid to the ground. These should be placed at regular intervals along the edges and seams of the geogrid.
- Tension the Geogrid: As you secure the geogrid, make sure to apply enough tension to keep it flat and taut. However, be careful not to over-tension the geogrid, as this can cause it to stretch or break.
- Check for Wrinkles or Buckles: Once the geogrid is secured, check for any wrinkles or buckles. If you find any, gently smooth them out using a roller or your hands.
4. Filling and Compacting
After the geogrid is secured, it's time to fill the area with soil or other backfill material. This step is critical for ensuring the long-term performance of the geogrid.
- Use the Right Fill Material: Choose a fill material that is compatible with the geogrid and the project requirements. The fill material should be free of large rocks, debris, or organic matter.
- Fill in Layers: Fill the area in layers, compacting each layer as you go. This will help ensure that the fill material is evenly distributed and that the geogrid remains flat and stable.
- Avoid Overloading: When filling the area, be careful not to overload the geogrid. This can cause it to deform or break, leading to poor performance.
5. Inspection and Maintenance
Once the installation is complete, it's important to inspect the geogrid regularly to ensure it remains flat and in good condition.
- Check for Damage: Look for any signs of damage, such as tears, cuts, or punctures. If you find any damage, repair it immediately to prevent it from spreading.
- Monitor the Performance: Keep an eye on the performance of the geogrid over time. If you notice any issues, such as settlement or erosion, take corrective action as soon as possible.
- Maintain the Site: To prevent damage to the geogrid, keep the site clean and free of debris. Avoid driving or parking heavy equipment on the geogrid, and make sure any drainage systems are working properly.
Other Considerations
In addition to the steps outlined above, there are a few other things to keep in mind when installing Biaxial Geogrid 40kn.
- Weather Conditions: Avoid installing the geogrid in extreme weather conditions, such as heavy rain, snow, or high winds. These conditions can make it difficult to keep the geogrid flat and can also damage the geogrid.
- Installation Equipment: Use the right installation equipment for the job. This will help ensure that the geogrid is installed correctly and that it remains flat and stable.
- Training and Experience: Make sure the installation team has the necessary training and experience to install the geogrid correctly. This will help prevent mistakes and ensure the long-term performance of the geogrid.
Conclusion
Ensuring the flatness of Biaxial Geogrid 40kn during installation is essential for its performance and the success of your project. By following the tips outlined in this blog, you can ensure that the geogrid is installed correctly and that it remains flat and stable over time.
If you're interested in purchasing Biaxial Geogrid 40kn or other geogrid products, such as PP Biaxial Geogrid 30kn or PP Biaxial Geogrid BX1200, please feel free to contact us. We'd be happy to discuss your project requirements and provide you with a quote.
References
- ASTM D6637/D6637M - 18 Standard Specification for Geogrids for Unpaved Road Applications
- FHWA Geosynthetics in Highway Construction - A Primer
- Manual of Practice for Geosynthetic Reinforced Soil Structures